[root@k8smaster Install]# uname -a
Linux k8smaster 3.10.0-1160.31.1.el7.x86_64 #1 SMP Thu Jun 10 13:32:12 UTC 2021 x86_64 x86_64 x86_64 GNU/Linux
[root@k8smaster Install]# cat /etc/redhat-release
CentOS Linux release 7.9.2009 (Core)
[root@k8smaster Install]# kubectl version -o yaml
clientVersion:
buildDate: "2021-06-16T12:59:11Z"
compiler: gc
gitCommit: 092fbfbf53427de67cac1e9fa54aaa09a28371d7
gitTreeState: clean
gitVersion: v1.21.2
goVersion: go1.16.5
major: "1"
minor: "21"
platform: linux/amd64
serverVersion:
buildDate: "2021-06-16T12:53:14Z"
compiler: gc
gitCommit: 092fbfbf53427de67cac1e9fa54aaa09a28371d7
gitTreeState: clean
gitVersion: v1.21.2
goVersion: go1.16.5
major: "1"
minor: "21"
platform: linux/amd64
Kubernetes有一个HPA(Horizontal Pod Autoscaler)的资源,可以实现基于CPU使用率的Pod自动伸缩的功能
注意从kubernetes1.11开始Heapster被废弃不在使用,metrics-server 替代了heapster
实现HPA首先需要部署metrics-server,一个集群级别的资源利用率数据的聚合器
部署metrics-server步骤:
下载yaml文件:
wget https://github.com/kubernetes-sigs/metrics-server/releases/download/v0.5.0/components.yaml
修改components.yaml文件的内容,如下图所示:
130 containers:
131 - args:
132 - --cert-dir=/tmp
133 - --secure-port=443
134 - --kubelet-insecure-tls #新增配置
135 - --kubelet-preferred-address-types=InternalIP,Hostname,InternalDNS,ExternalDNS,ExternalIP #将原配置删除,加入这个配置
136 - --kubelet-use-node-status-port
137 - --metric-resolution=15s
138 image: k8s.gcr.io/metrics-server/metrics-server:v0.5.0
镜像文件k8s.gcr.io/metrics-server/metrics-server:v0.5.0 在国内下载不了,到国外下载后导入到docker images中
修改配置文件以及导入完镜像之后,通过下面的命令安装:
kubectl apply -f components.yaml
配置完成后,查看是否安装成功:
[root@k8smaster Install]# kubectl get pods -n kube-system | grep metrics
metrics-server-68b4589985-96vxh 1/1 Running 0 149m
如果以上POD有运行,代表metrics-server运行正常
验证
查看集群节点资源使用情况(CPU,MEM)
kubectl top nodes
[root@k8smaster Install]# kubectl top nodes
NAME CPU(cores) CPU% MEMORY(bytes) MEMORY%
k8snode 1847m 9% 9011Mi 28%
node 691m 3% 5106Mi 32%
安装完成以后每个pod需要配置CPU限制!!!
如果不配置无法获取到数据
命令行配置:
设置myreplicaset 最少1个,最多10个,cpu资源最多使用40%
kubectl autoscale deployment hexin-product-deployment --min=1 --max=10 --cpu-percent=50
YAML配置案例:
Deployment容器配置:
[root@k8smaster hexin_product]# cat hexin_product_deployment.yaml
apiVersion: apps/v1
kind: Deployment
metadata:
name: hexin-product-deployment
spec:
replicas: 1
selector:
matchLabels:
app: hexin-product
template:
metadata:
labels:
app: hexin-product
spec:
imagePullSecrets:
- name: registrykey-myhub
containers:
- name: hexin-product
image: hub.linuxmysql.com/php/rsc/hexin_product_prod:2
imagePullPolicy: Always
volumeMounts:
- name: storage-nfs-pvc
mountPath: "/www/wwwroot/storage"
- name: nginx-conf
mountPath: /etc/nginx/conf.d/server.conf
subPath: server.conf
ports:
- containerPort: 80
protocol: TCP
- containerPort: 443
protocol: TCP
- containerPort: 10010
protocol: TCP
resources:
limits:
cpu: "1"
memory: 1024Mi
requests:
cpu: 500m
memory: 128Mi
env:
- name: hexin-product
value: hexin-product
nodeName: k8snode
volumes:
- name: storage-nfs-pvc
persistentVolumeClaim:
claimName: hexin-product-pvc
- name: nginx-conf
configMap:
name: hexin-product-nginx-conf
创建HPA yaml文件:
[root@k8smaster php]# cat hexin_product_hpa.yaml
apiVersion: autoscaling/v2beta1
kind: HorizontalPodAutoscaler
metadata:
name: hexin-product-deployment-hpa # 名称
spec:
scaleTargetRef:
apiVersion: apps/v1
kind: Deployment
name: hexin-product-deployment # 监控名为hexin-product-deployment的Deployment
minReplicas: 1 # 最小副本数
maxReplicas: 10 # 最大副本数
metrics:
- type: Resource
resource:
name: cpu
targetAverageUtilization: 50 # cpu的阈值
- type: Resource
resource:
name: memory
targetAverageValue: 1024Mi # 内存的阈值
应用HPA配置:
[root@k8smaster hexin_product]#kubectl create -f hexin_product_hpa.yaml
查看HPA的资源:
[root@k8smaster hexin_product]# kubectl get hpa
NAME REFERENCE TARGETS MINPODS MAXPODS REPLICAS AGE
hexin-product-deployment-hpa Deployment/hexin-product-deployment 219365376/1Gi, 0%/50% 1 10 1 30m
假如targets字段有显示unknown
原因
刚建立,等待一段时间再查看
需要自动伸缩的目标资源并没有进行资源限制
对目标资源一定要加上:
resources:
requests:
memory: "64Mi"
cpu: "250m"
limits:
memory: "128Mi"
cpu: "1"
再执行
kubectl apply -f 对应的资源yaml
然后重新查看
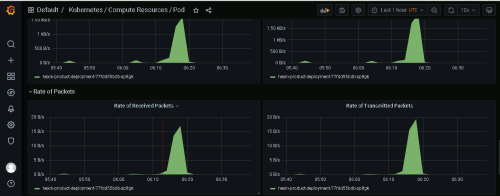
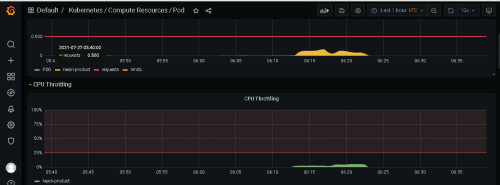
通过jmeter对接口进行压力测试:


刚开始是3个POD:
[root@k8smaster hexin_product]# kubectl get pods | grep product
hexin-product-deployment-77fdd55bdb-dcrlr 1/1 Running 0 5m11s
hexin-product-deployment-77fdd55bdb-lkmwq 1/1 Running 0 5m11s
hexin-product-deployment-77fdd55bdb-sp8gk 1/1 Running 0 4d22h
压力测试一段时间后变成5个POD:
[root@k8smaster hexin_product]# kubectl top pods | grep product
hexin-product-deployment-77fdd55bdb-6wdh5 0m 116Mi
hexin-product-deployment-77fdd55bdb-blzb2 0m 116Mi
hexin-product-deployment-77fdd55bdb-dcrlr 0m 209Mi
hexin-product-deployment-77fdd55bdb-lkmwq 0m 230Mi
hexin-product-deployment-77fdd55bdb-sp8gk 0m 209Mi
过一段时间后,POD的数据又重新降为1个:
[root@k8smaster hexin_product]# kubectl top pods | grep product
hexin-product-deployment-77fdd55bdb-sp8gk 0m 209Mi
以上实验说明,HPA配置成功并生效


 Kubernetes 1.21.2部署HPA实现POD自动水平扩缩容
